Some of the links in this article may be affiliate links. If you make a purchase through these links, we may earn a small commission at no extra cost to you. Thank you.
I’ve been creating geocaches for over five years now, and I’ll never forget the thrill of hiding my first container. It’s actually easier than you might think to start—though there are some rules you should definitely know about. I’ve made all the rookie mistakes (like placing a cache too close to another one, oops) so you don’t have to. Ready to join the worldwide treasure hunt from the other side of the game?
Understanding Geocaching Guidelines and Rules
Why do we need to learn rules before hiding our first geocache?
Well, these guidelines aren’t just bureaucratic red tape—they protect the environment and guarantee the game stays enjoyable for everyone.
When you hide your cache, you’ll need to make sure it’s at least 528 feet from existing caches to prevent overcrowding.
Selecting the Perfect Location for Your Cache
I’ve found that choosing the right spot for your geocache is actually one of the most vital decisions you’ll make.
When I’m scouting locations, I look for places that are interesting but not too busy—think scenic overlooks or quiet park corners where people won’t accidentally stumble on your cache.
Before hiding anything, you’ll need to check if you need permission (trust me, this step saves headaches later) and make sure you’re at least 528 feet from other caches.
Location Selection Fundamentals
When selecting a location for your first geocache, where you place it can make or break the entire experience.
I’ve found that the best geocache locations blend naturally with their surroundings—think tree hollows or underneath park benches—while remaining well hidden from casual passersby.
You’ll want to choose a starting point that’s accessible but not in high-traffic areas, which helps prevent non-geocachers from accidentally finding your treasure.
Scout Strategic Spots
Three critical factors determine the perfect geocache location: distance, legality, and visibility.
When I scout locations, I always check if they’re at least 528 feet from other caches.
Trust me, there’s nothing worse than placing your carefully hidden treasure too close to another!
Locations you might consider include public parks or historic sites—just make sure geocaching is permitted there.
I think the best spots are ones where GPS coordinates to find your cache are clear, but X marks the spot isn’t obvious to random passersby.
When placing your cache, aim for spots near trails or viewpoints, but—wait, not too close to the path!
You want finders to enjoy the hunt without muggles (non-geocachers) accidentally stumbling upon it.
Permission Is Essential
Why is permission so essential when placing your geocache?
Simply put, it’s the difference between a long-lasting contribution to the community and one that’s quickly removed—or worse, gets you into legal trouble.
As I’ve learned through experience, following proper guidelines saves everyone headaches.
Before hiding your container, make sure you:
- Obtain necessary permits from park authorities or landowners—many public areas have specific rules requiring approval
- Get written permission for private property placement, which protects you from future disputes
- Check if your chosen spot is at least 528 feet from existing caches per Geocaching.com guidelines
Remember to steer clear of restricted zones like airports and military bases.
Trust me, these aren’t just suggestions—they’re essential steps that’ll keep our hobby enjoyable for everyone.
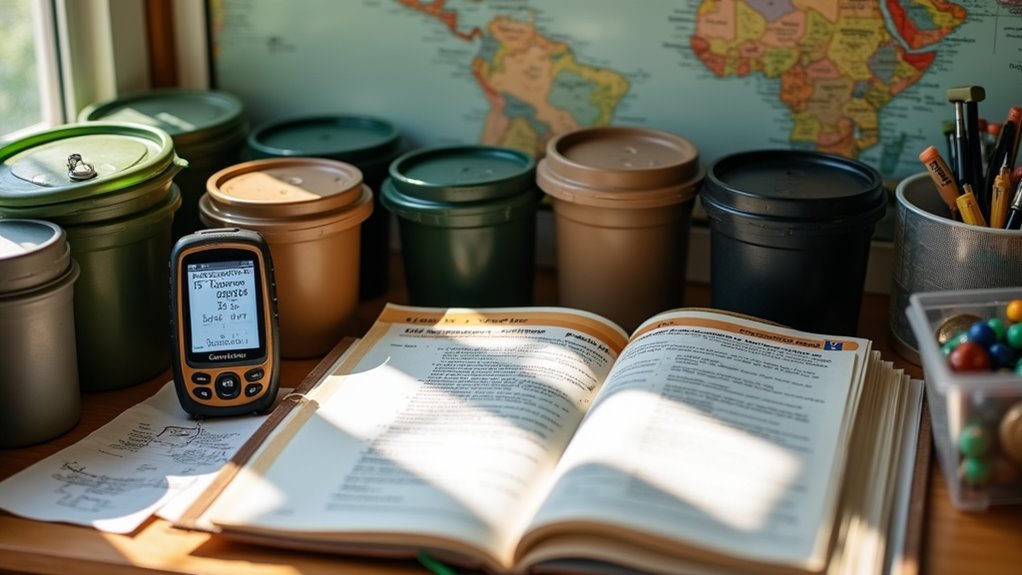
Choosing the Right Container for Your Geocache
Selecting the right container for your geocache might seem trivial, but I’ve found it’s actually one of the most essential decisions you’ll make in the entire process.
Different types of caches require appropriate containers—micro caches are about film canister-sized while regular caches include shoebox-sized options that can hold various trade items inside the cache.
When choosing, I always consider durability first.
Military ammo boxes are my go-to for traditional caches since they’re waterproof and can withstand pretty much anything nature throws at them.
But if you’re planning something urban, those tiny nano caches are perfect to find hidden containers in plain sight.
Remember to match your container to both the environment and difficulty level—the size of the cache should reflect its purpose.
Caches come in all shapes and sizes, so pick what makes sense for your hiding spot.
Essential Items to Include in Your Cache

When I created my first cache, I learned the hard way that container selection is just the beginning—what you put inside truly matters!
You’ll need a logbook where finders can sign their names and dates, which can be as simple as a small notebook or even a rolled paper in a tiny container.
Don’t forget to include a writing instrument and a note explaining what geocaching is, especially if your cache might be discovered by someone unfamiliar with our treasure-hunting hobby.
Container Selection Basics
Packing your geocache with the right items makes all the difference between a forgettable find and one that’ll have seekers talking for weeks.
I’ve found that every good cache needs a small notebook or piece of paper for logging, along with a pen or pencil so finders can actually sign it.
Don’t forget to include swap items if your container has room!
For a successful cache, make sure you include:
- A logbook where geocachers can sign their username and date they found it
- Small trinkets or swag inside for people to trade (I prefer toy cars or keychains)
- A clear note explaining what geocaching is for newbies who stumble upon it
Remember to protect everything in a zip-lock bag. Trust me, nothing ruins a cache experience like finding soggy, unreadable paper!
Signature Logbook Elements
The logbook inside your cache is where the real magic happens—it’s the heart of the geocaching experience.
When geocachers find your container, they’ll sign the logbook with their geocaching username and date, creating a physical record of their adventure.
Always include a small waterproof notebook protected in a zip-lock bag—trust me, moisture is your enemy here!
Add a simple identification note explaining what geocaching is, just in case someone unfamiliar stumbles upon it.
Don’t forget to provide a pencil or pen.
While experienced cachers often bring their own pen (BYOP), newcomers mightn’t know this unwritten rule.
I’ve found that labeled instructions like “Sign and date here” are super helpful, especially when your logbook is full of logs from other geocachers.
Creative Ways to Camouflage Your Container
Camouflaging your geocache container might actually be the most fun part of creating a hide!
I like to think of it as an art form that blends function with stealth.
When I’m hiding a cache in the forest, I never use something like an oyster shell—it would stick out like, well, a shell in the forest!
Remember the golden rule of geocaching: Leave No Trace, so whatever materials you use, make sure they’re environmentally friendly.
Here are my favorite camouflage techniques:
- Paint your container with earth tones that match the surroundings
- Attach natural materials like bark or moss with weather-resistant glue
- Use camouflage tape or fabric that mimics local terrain
While you’re out placing your cache, use your eyes to pick up any litter—practice CITO (Cache In, Trash Out) with whatever you need to bring.
Recording Accurate GPS Coordinates
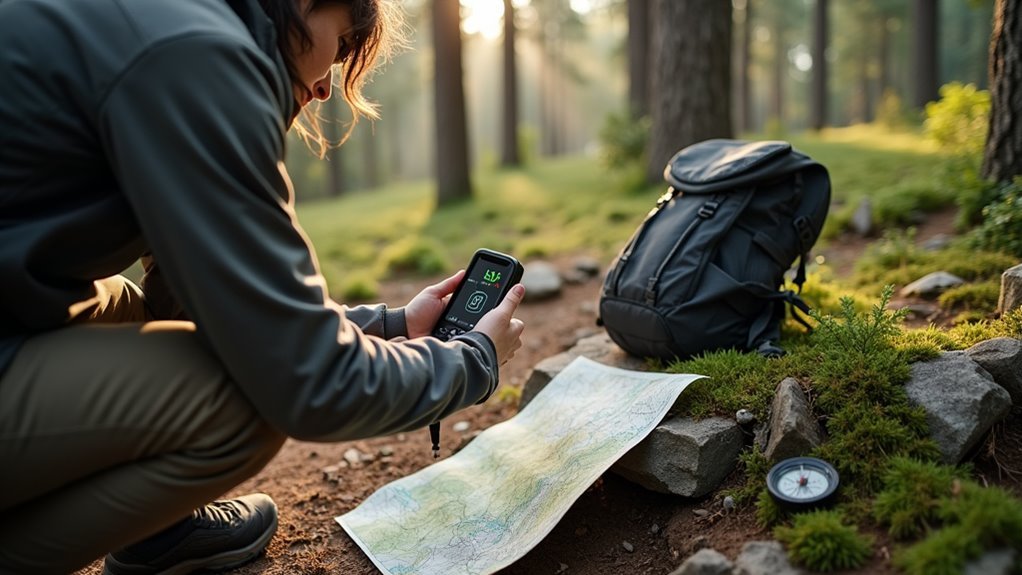
Now that your cache is perfectly camouflaged, getting accurate GPS coordinates is what’ll make or break your hide. Trust me, I’ve learned the hard way!
First, find an open area away from trees and buildings. Use the Geocaching app on your smartphone or a dedicated GPS unit—just remember to pack extra batteries!
I think the app is easiest for beginners since it connects directly to your Geocaching.com account.
Wait about two minutes to let your device stabilize. This might seem long, but it’s worth it—kinda like waiting for your coffee to brew properly.
Take multiple readings and compare them. If they’re consistent, you’ve got your X marks the spot! Record coordinates immediately in decimal degrees format (like 37.7749° N, 122.4194° W).
Writing a Compelling Cache Description
Why would anyone care about your geocache if your description’s a snooze fest?
As a cache owner, know that your words are the first impression geocachers get of your hide.
I’ve found that the geocaching community responds best when you paint a vivid picture that makes them want to visit.
- Specify your cache type clearly (traditional, mystery, etc.) so searchers can prepare properly
- Highlight what makes your location special—maybe it’s near a cool historic site or offers an amazing view
- Include subtle hints that add challenge without giving everything away
Taking Quality Photos for Your Listing
When I first started taking geocache photos, I quickly learned that capturing multiple angles shows seekers what to look for without giving away the hiding spot.
I’ve found that natural daylight works wonders for bringing out the true colors and details of your container—try shooting in the golden hour for that perfect warm glow.
Photos don’t need to be professional quality, but they should give searchers enough context to recognize the environment they’ll be exploring.
Angles and Perspectives
How you shoot your geocache photos can make or break your listing’s appeal.
I’ve found that mixing up your angles gives potential seekers just enough visual information without spoiling the hunt.
Experiment with eye-level shots for a seeker’s perspective, then try low angles to make natural features pop, or high angles for context without revealing too much.
When I frame my geocache photos, I always keep the rule of thirds in mind—it’s amazing how much more engaging off-center compositions are! I’d recommend these approaches:
- Use wide-angle perspectives to capture the surrounding environment
- Try 45-degree oblique angles instead of spoiler overhead shots
- Alternate between landscape orientation for panoramic views and portrait for vertical details
Natural Light Techniques
Natural light transforms an ordinary geocache photo into something truly magical for your listing. I’ve found that shooting during the “golden hour” (just after sunrise or before sunset) gives you everything you need for stunning images with warm, vibrant colors.
When I’m out hiking with my GPS or smartphone, I always try to use the app during these ideal lighting times. If you need to take photos midday, position your cache in diffused light—maybe under some trees—to avoid those harsh shadows.
In my experience, geocaching combines hiking with a tech-aided treasure hunt, so your photos should reflect that adventure!
Try using natural reflectors like nearby leaves or water to bounce light onto your subject.
Honestly, you don’t need fancy equipment—just smart timing and positioning.
Submitting Your Cache for Approval
The exciting moment has finally arrived!
After hiding your cache, you need to sign in to your free account on Geocaching.com to submit it for approval.
Make sure your cache listing includes everything fellow geocachers need to know to find and enjoy your experience online.
Create detailed cache listings with all necessary information for a successful and enjoyable geocaching adventure.
The review process typically takes a few days, but it’s worth the wait to keep track of your creation officially.
When submitting, remember:
- Verify your cache is at least 528 feet from other caches to avoid proximity issues
- Double-check your coordinates using a reliable GPS device
- Include a descriptive title, size, difficulty rating, and helpful hints
I think the hardest part is waiting for approval!
Be prepared for possible feedback from reviewers—they’re just making sure your cache follows all guidelines.
Maintaining Your Geocache Long-Term
Once you’ve gotten that exciting approval notification, you’re officially a cache owner—but your journey’s just beginning!
Maintaining your geocache is honestly where the real work happens.
Check the latest activity on geocaching.com every few weeks—I think it’s essential to catch any issues before they become problems.
You might need to move your cache if the environment changes (happens more than you’d expect after two decades of this passionate community’s experience).
Visit your cache every 3-6 months, depending on how popular it is.
Replace logbooks, put everything back in order, and—wait, did I mention checking online logs regularly?
Well, that’s actually super important.
With proper maintenance, your cache won’t be among the thousands archived yearly.
Trust me, a premium membership makes tracking maintenance easier, but it’s not, um, absolutely necessary.
Frequently Asked Questions
How Do I Start Geocaching for Beginners?
I’d recommend downloading the Geocaching app, learning GPS usage through online tutorials, packing gear essentials like pens, and practicing trail exploration while following safety precautions. Consider attending events to meet experienced cachers!
How Do I Make My First Geocache?
I’ll create the WILDEST first geocache! Select unique CacheContainers, master HidingTechniques, include fun SwagIdeas, create a weatherproof LogbookDesign, use GPSTips for accuracy, consider TerrainSelection, and assign an appropriate DifficultyRating.
Do People Still Geocache in 2025?
I’m seeing strong participation rates and global appeal continuing in 2025. The community evolution embraces technological changes while maintaining geocaching’s environmental impact focus. Digital shifts are actually enhancing future trends, not diminishing them.
What Are the Three Main Rules of Geocaching?
I’d say our three main geocaching rules are: Leave No Trace (ethical community standard), Sign the Logbook (historical rule with enforcement implications), and Trade Equal or Better items (global practice with variations but penalties for non-compliance).