Some of the links in this article may be affiliate links. If you make a purchase through these links, we may earn a small commission at no extra cost to you. Thank you.
Creating your first geocache is simpler than you might expect — and far more rewarding. In short: choose a container, pick a secret hiding spot, add a logbook, record your GPS coordinates, and submit a listing on Geocaching.com. Once approved, your hide joins over 3 million active geocaches hidden across more than 190 countries worldwide.
Thank you for reading this post, don't forget to subscribe!
Key Takeaways
- Find at least 20 geocaches before hiding your first — experience as a seeker makes you a sharply better hider.
- Choose a traditional cache and a small or regular container for your first hide — they offer the best balance of concealment, durability, and finder satisfaction.
- Your cache must sit at least 528 feet from any other active listing, and you must have explicit landowner or land manager permission before placing.
- Accurate coordinates, an honest difficulty/terrain rating, and a compelling listing description get your cache approved faster and found more often.
What Is a Geocache and Why Should You Create One?
A geocache is a hidden container that participants in the worldwide geocaching game find using GPS coordinates. The activity started on May 3, 2000, when Dave Ulmer hid the very first cache near Beavercreek, Oregon, posted its coordinates online, and challenged the internet to find it. Within days, multiple people had located it. That single experiment sparked a global outdoor phenomenon that now spans 191 countries.
Today, Geocaching.com hosts more than 3 million active geocache listings. According to Geocaching HQ, millions of people actively participate in the hobby every year. When you create a cache, you become part of that network. You give strangers a reason to visit a favourite spot, discover hidden local history, or simply step away from a screen and into the outdoors. Environmental psychology research consistently links time spent in natural outdoor settings with measurable reductions in self-reported stress and improved mood. Hiding a cache means you get to share that benefit with every person who signs your logbook.
Cache creators — called “cache owners” or simply “CO” in community shorthand — are the backbone of the game. Without people willing to hide, maintain, and care for caches, there would be nothing to find. Creating your first geocache shifts your perspective from pure seeker to active contributor. Many longtime geocachers say hiding their first cache deepened their love of the hobby more than any individual find ever did.
What Do You Need Before You Can Hide Your First Geocache?
Before you hide a single container, there are a few essentials to tick off. Getting these right upfront saves time and prevents a rejected listing down the road.
Find Caches First
Geocaching.com strongly recommends finding at least 20 caches before placing your first hide. This is not an arbitrary number. Each find teaches you something: how creative a great hide feels, how frustrating a poorly placed one is, what a soggy logbook looks like after one wet winter, and why accurate coordinates matter so much. Experienced geocachers consistently report that hiders with significant find experience produce better, higher-rated listings than those who jump straight to hiding. Put the time in as a seeker first. Your future cache will be dramatically better for it.
Create a Geocaching.com Account
You need an account on Geocaching.com to submit a listing. A free Basic membership allows you to create and submit traditional cache listings. A Premium membership — priced at around $30 per year as of 2026 — unlocks additional cache types, enhanced listing tools, and access to the full cache management dashboard. For your first hide, a free account is entirely sufficient.
Get Landowner or Land Manager Permission
This step surprises many new hiders. You cannot place a geocache on land you do not own without explicit permission. For public parks, national forests, or recreation areas, contact the managing authority in writing before placing anything. Many land managers have specific geocaching approval processes and require documentation. Geocaching.com volunteer reviewers routinely ask for evidence of permission on sensitive lands, and a cache placed without it risks immediate archival. According to Geocaching HQ’s official cache listing guidelines, obtaining landowner permission is a non-negotiable requirement for responsible cache placement.
What Are the Different Types of Geocaches You Can Create?
Geocaching.com supports a wide range of cache types. As a first-time hider, your best option is almost always a Traditional Cache. Here is a clear comparison of the most common types available to all members.
| Cache Type | Description | Best For | Beginner Friendliness |
|---|---|---|---|
| Traditional | Single container at the listed coordinates | First-time hiders | ⭐⭐⭐⭐⭐ Easy |
| Multi-Cache | Multiple stages leading to a final container | Storytelling hides | ⭐⭐⭐ Moderate |
| Mystery / Puzzle | Solve a puzzle to reveal true coordinates | Creative hiders | ⭐⭐ Advanced |
| EarthCache | Geological feature — no physical container | Nature-focused hiders | ⭐⭐⭐ Moderate |
| Letterbox Hybrid | Combines GPS coordinates with directional clues | Adventure enthusiasts | ⭐⭐⭐ Moderate |
Traditional caches are the most expected and most-searched cache type on the platform. They are also the simplest to plan, place, maintain, and get approved. For your first hide, start with a traditional. You can always graduate to multi-caches, puzzle caches, and EarthCaches once you have the fundamentals firmly in hand.
What Cache Size Should You Choose for Your First Hide?
Container size is one of the most important decisions you will make as a new cache owner. Geocaching.com uses five standard size designations: Nano, Micro, Small, Regular, and Large. Each involves real trade-offs between concealment, durability, logbook capacity, and trade item space.
- Nano / Micro: Tiny magnetic or mini pill-bottle containers. Simple to conceal but hold only a tightly rolled strip logbook. No space for trade items. Popular in urban settings where larger containers attract attention.
- Small: Roughly the size of a 35mm film canister or small Tupperware. Fits a compact logbook and a handful of tiny trinkets. A solid, versatile choice for woodland or suburban hides.
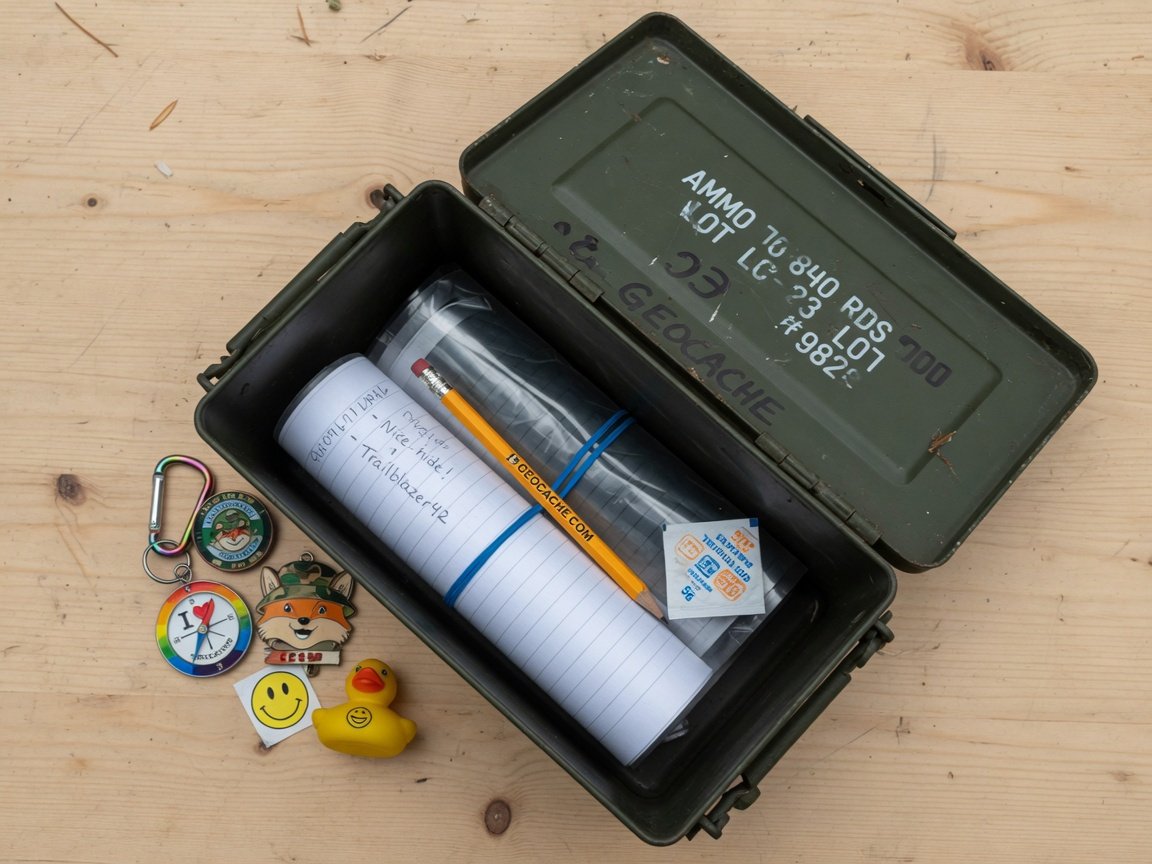
- Regular: Lock-and-lock containers or military-surplus ammo cans in the 500ml–1L range. Plenty of room for a full logbook, a pen, trade items, and a desiccant packet. The gold standard for nature hides.
- Large: Buckets or similar oversize containers. Uncommon and best suited for themed adventure caches with generous trade stock.
For a first hide, a small or regular container offers the best balance. Regular-sized ammo cans are virtually weatherproof, survive years of outdoor exposure, and are beloved by the geocaching community for their reliability. Community feedback consistently shows that regular-sized caches earn higher average ratings than micro caches — largely because they accommodate a proper logbook and a working pen, two things finders genuinely appreciate on a cold, muddy afternoon.
How Do You Choose the Perfect Hiding Spot for Your Geocache?
Location is everything in geocaching. A modest container in a spectacular location consistently beats a pristine container in a forgettable one. Use these criteria when scouting your hiding spot.
Check the 528-Foot Saturation Rule
According to Geocaching.com guidelines, every cache must sit at least 528 feet (0.1 miles, or approximately 161 metres) from any other active cache listing. This prevents geocache saturation and ensures each cache delivers a distinct search experience. Use the Geocaching app or the website’s map view to check for existing caches in your target area before committing to a location. Finding out a spot is too close after you have already prepped your container is a frustrating waste of time.
Ask Yourself: Why Is This Spot Worth Visiting?
The best geocaches send seekers somewhere genuinely worth going. Is your spot a scenic overlook? A quirky piece of local history? A hidden waterfall, an unusual rock formation, or a piece of urban art? According to the geocaching community’s widely shared Golden Rule, a cache should reward finders with either a memorable find experience, a remarkable location, or — ideally — both. A cache wedged behind a guardrail in a car park technically qualifies as a geocache. But it rarely earns five-star reviews.
Think About Muggles and Container Visibility
In geocaching, “muggles” are the affectionate term for non-participants who might accidentally or intentionally disturb a cache. Busy car parks, school grounds, and any openly visible ledge are high-muggle-risk zones. Community analysis of archived caches consistently identifies muggling and accidental discovery as leading causes of premature cache loss. Choose spots with natural cover that hides the container from casual observers while remaining findable for determined seekers.
Also assess terrain honestly. A path that feels fine in July may be flooded, icy, or unstable in February. Your terrain (T) rating must accurately reflect conditions seekers will face across all seasons. Misrepresenting terrain — even unintentionally — creates safety risks and generates negative log entries.
How Do You Prepare Your Geocache Container?
Once your container and location are confirmed, it is time to kit out the cache. A well-prepared container is the difference between enthusiastic five-star log entries and “TFTC” (Thanks For The Cache) — the geocaching equivalent of a polite shrug.
- Label the container. Attach a waterproof label to the inside lid that reads: “This is a geocache. For more information visit Geocaching.com.” Include your Geocaching.com username and email address. This helps anyone who discovers it by accident understand exactly what they have found.
- Add a logbook. Use a waterproof notepad or a tightly rolled paper strip sealed inside a polythene bag. Finders sign and date the logbook on-site. For small containers, pre-ruled paper strips work beautifully. For regular containers, a pocket-sized spiral notepad is ideal.
- Include a pencil or pen. Many seekers forget to bring their own writing tool. A short golf pencil or a small pen clipped to the inside lid keeps the logbook usable for everyone. Avoid felt-tip pens — they bleed badly when the logbook gets damp.
- Add trade items (optional, but popular). If your container is small or larger, add a few trinkets — keyrings, small toys, coins, stickers, or collectible pins. Follow the community’s cardinal rule: trade equal or trade up. Never leave food items, which attract wildlife and degrade quickly.
- Drop in a desiccant packet. A silica gel sachet absorbs moisture and dramatically extends the life of your logbook through wet seasons. They cost almost nothing and signal a genuinely thoughtful cache owner.
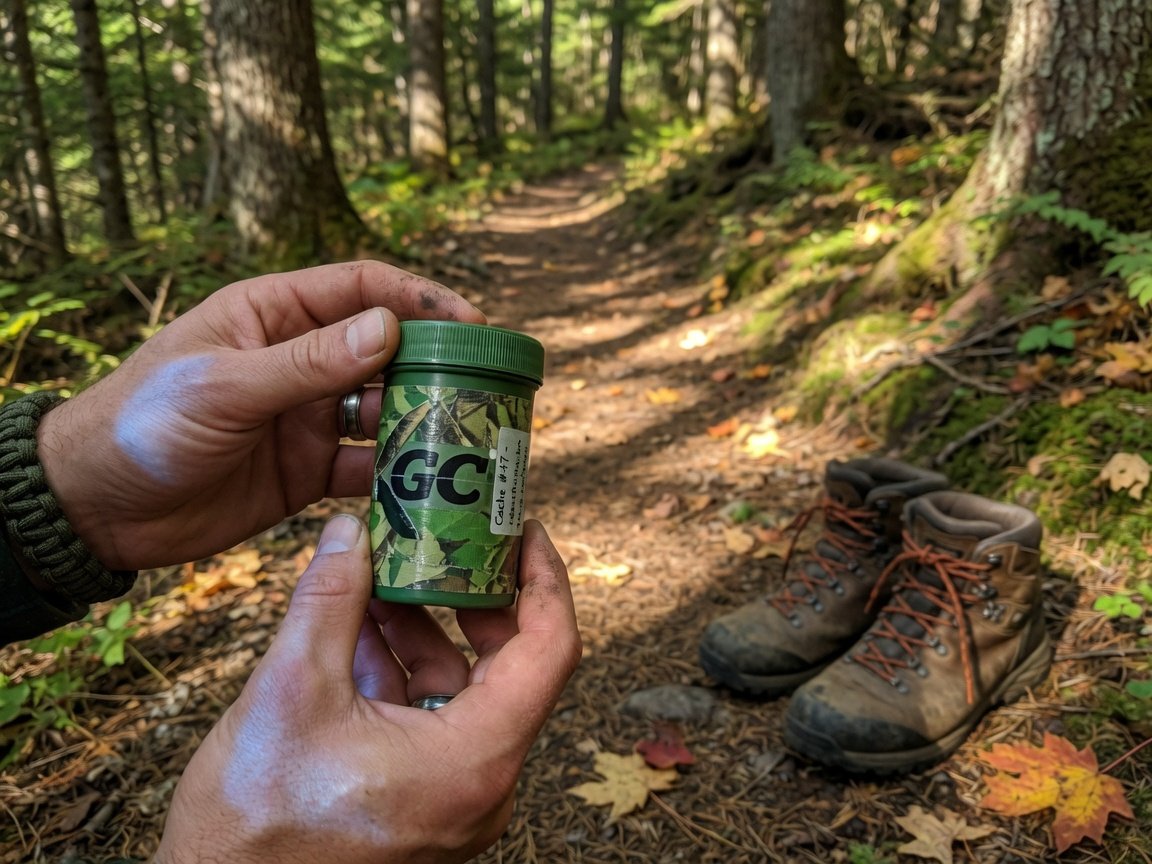
- Camouflage the container. Spray paint, camo tape, natural-material wrapping, or a purpose-made cache container can help your hide blend seamlessly into its surroundings. Just ensure it remains safely handleable and identifiable as a geocache once found.
How Do You Record Precise Coordinates for Your Geocache?
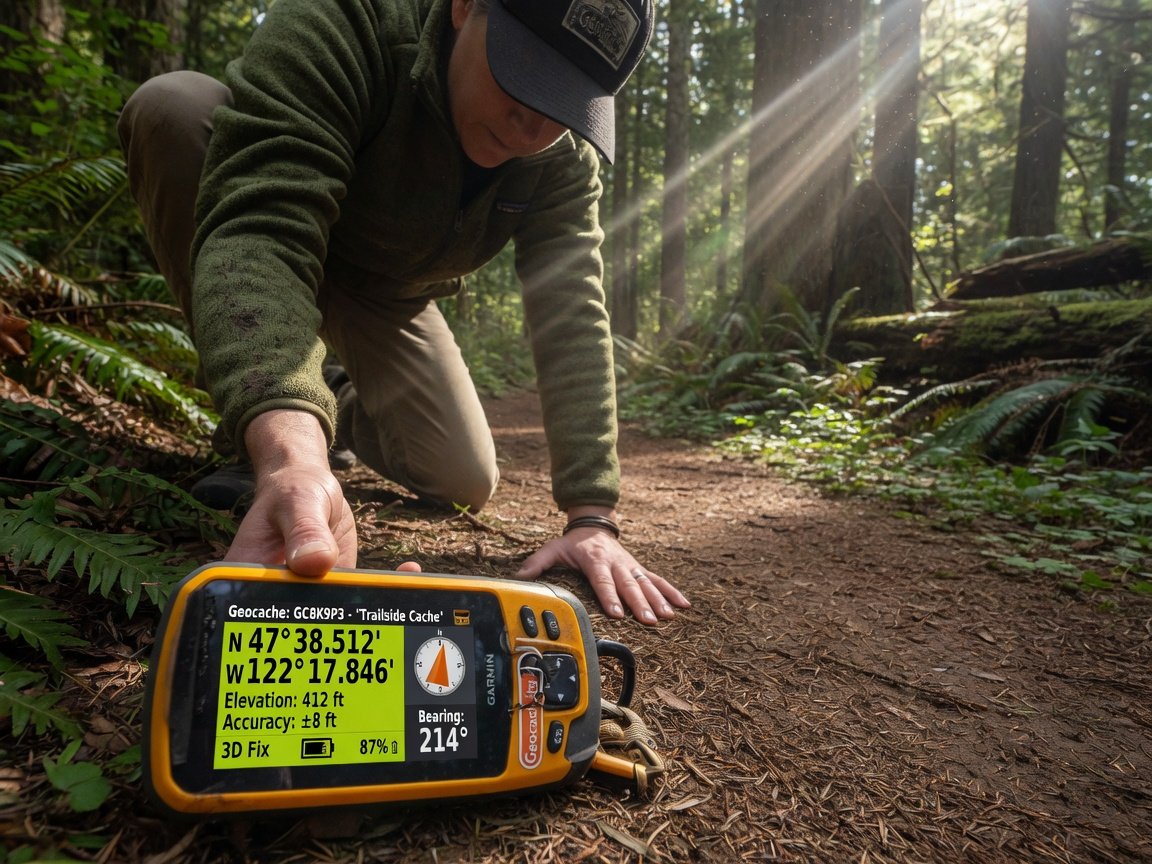
Coordinate accuracy is the single most important technical factor in a great geocaching experience. Even a 20-metre error can send a seeker to completely the wrong spot. Consumer GPS devices and smartphones are accurate to roughly 3–5 metres under open sky. Canopy cover, tall buildings, and atmospheric conditions can push that error higher. Here is how to get your coordinates as precise as possible.
- Stand at or directly beside your cache. Record coordinates from the exact spot — not from a few metres away while leaning against a tree.
- Average multiple readings. Take at least 5–10 individual readings at different times of day and average them. The Geocaching app includes a built-in coordinate averaging function. Averaged coordinates are almost always significantly more accurate than a single snapshot reading.
- Use decimal degrees format (DD.DDDDD). This is the standard format Geocaching.com uses for all listings. Convert other formats using the app or a free online converter before submitting.
- Verify on a map. Paste your coordinates into a mapping tool and confirm the pin drops exactly where you expect. This one simple check catches transposition errors before a single seeker goes looking.
- Do a test search. After placing the cache, reset your GPS device and navigate to it from at least 50 metres away. If you can locate it using only your own listed coordinates, seekers can too.
“Inaccurate coordinates are the number one source of frustration in geocaching logs. Take the time to average your readings across multiple visits — your future finders will absolutely thank you for it.”
— Geocaching HQ, Official Cache Listing Guidelines
How Do You Write a Geocache Listing That Gets Found and Loved?
Your listing is both a practical navigation tool and a genuine invitation. It tells seekers how challenging the find will be, what to expect at the location, and whether the trip is worth their afternoon. A thoughtfully written listing generates more finds, warmer log entries, and higher favourite-point ratings. Here is what every strong listing needs.
Cache Name
Choose a name that hints at the location or theme without giving anything away. “Rock of Ages #47” is forgettable. “The Whispering Pines Overhang” creates genuine intrigue. Keep names under 30 characters for clean display on GPS devices and the app’s compact listing view.
Difficulty and Terrain Ratings
The D/T (Difficulty/Terrain) rating uses a 1–5 scale in half-star increments. Difficulty rates how hard the cache is to locate. Terrain rates the physical challenge of reaching it. Be scrupulously honest — an overly easy rating for a genuinely tricky hide frustrates experienced seekers. An inflated difficulty rating deters the casual family finder your location would be perfect for. For a first hide, a D1.5–2/T1.5–2 rating signals a satisfying but accessible experience for most seekers.
Description
Write a description that enriches the experience. Share the history of the location. Describe what seekers will see when they arrive. Tell them why you chose this specific spot. You do not need to describe the container itself — save any physical clues for the encrypted hint field. Aim for 100–250 words: enough to add genuine value, short enough to read comfortably on a small smartphone screen while standing in a field.
The Encrypted Hint
The hint field is encrypted and completely optional — but the majority of well-received cache listings include one. Use it to give a gentle nudge without spoiling the hunt. Good hints describe the general hide type or container position without stating the exact location. “Under a rock” is too vague to be useful. “Magnetic, north-facing side of the large stone pillar near the path junction” is perfect. The hint is a lifeline, not a giveaway.
Submitting Your Listing
Log in to Geocaching.com and navigate to Hide & Seek a Cache, then select Hide a Cache. Complete all required fields — cache type, container size, averaged coordinates, D/T ratings, description, and encrypted hint. Upload at least one photo of the area (not of the cache itself). Submit for review. A volunteer reviewer in your region will check your listing against Geocaching.com’s published guidelines and either publish it or send a polite revision request.
What Happens After Your Geocache Gets Published?
Most listings are reviewed within 3 to 7 days. When yours publishes, it becomes immediately visible to every Geocaching.com user in your region. In active geocaching communities, your cache may receive its first find within hours of going live.
First to Find (FTF) hunters are a dedicated subset of geocachers who race to sign new logbooks. They often post the most enthusiastic and detailed log entries of anyone who ever visits your hide — one of the most exciting moments you will experience as a new cache owner. Read every log entry carefully in your first two weeks. Early finders frequently leave coordinate-accuracy notes like “coords spot-on” or “coords off approximately 8 metres north” that help you make corrections while the cache is still fresh.
Activity typically spikes in the first week and stabilises over the following month. Rural caches tend to accumulate finds more slowly than suburban ones, but a genuinely special location will draw dedicated seekers regardless of remoteness. Word spreads fast in the geocaching community when a new cache offers something truly memorable.
“The best geocache hiders are almost always the best geocache seekers first. Every cache you find teaches you something that makes your own hide better.”
— Geocaching HQ, Guidelines for New Cache Owners
How Do You Maintain Your Geocache Over Time?
Owning a geocache is a long-term commitment, not a one-time activity. Geocaching.com explicitly states that cache owners are fully responsible for the ongoing condition and maintenance of their hides. Neglected caches frustrate seekers, damage the hobby’s reputation, and ultimately get archived. Here is how to stay on top of it.
- Monitor your logs actively. Log in regularly and read what finders write. Needs-Maintenance log types are an automatic flag that something is wrong — respond within two weeks and investigate in person promptly.
- Visit your cache seasonally. Check the container condition, replace the logbook when it is 80% full, swap out a soggy pen, refresh trade items, and top up the desiccant packet. A quarterly visit is a sensible minimum for most hides.
- Respond to consecutive DNFs (Did Not Find). If multiple seekers log “cache not found” in succession, visit and investigate immediately. Do not wait for a reviewer to disable your listing.
- Archive responsibly. If you relocate or can no longer maintain the cache, archive it via Geocaching.com rather than simply walking away. You can also transfer ownership to another active geocacher through the platform’s formal adoption process.
Maintenance is where many first-time hiders fall short. Community data consistently shows that neglected caches — those with unanswered Needs-Maintenance logs and consecutive DNFs — are among the top reasons new geocachers have frustrating experiences. The most respected cache owners in any local community are known as much for their meticulous maintenance habits as for their impressive find counts.
What Are the Most Common First-Hide Mistakes (and How to Avoid Them)?
New hiders make predictable mistakes. Knowing about them in advance means you can skip every single one.
- Inaccurate coordinates. Consistently the most common complaint in geocaching logs. Average your readings across multiple sessions and always do a self-guided test search before submitting your listing.
- No working pen or a ruined logbook. A soggy, ink-blurred logbook ruins the find experience instantly. Use a waterproof logbook or a sealed polythene bag, and always include a short golf pencil.
- Placing in restricted areas. Caches near schools, government buildings, airports, or on restricted lands get archived immediately and can create legal complications. Always check land ownership and local ordinances before placing.
- High-muggle exposure. Caches placed in visibly busy public spaces disappear quickly. Choose locations with sufficient natural cover to discourage casual passers-by while remaining findable for a determined seeker.
- Dishonest difficulty ratings. Rating an accessible hide as D4/T4 confuses and discourages seekers. Calibrate your ratings honestly against caches you have personally found at those difficulty levels.
- Ignoring ongoing maintenance. Set a recurring calendar reminder to check your cache every 90 days. A neglected cache wastes seekers’ time and chips away at your standing as a cache owner in the local community.
Real Example: What a Successful First Geocache Looks Like
Consider a geocacher who placed their first traditional cache — a regular-sized ammo can — near a little-known waterfall overlook in a state park. They averaged 10 GPS readings across two separate visits, wrote a 190-word listing description about the waterfall’s local history, rated the cache at D1.5/T2, and placed a handwritten welcome note inside alongside a small collection of collectible pins for trade.
The cache published on a Friday morning. By Sunday evening it had 9 finds and a 4.8-star average rating. Log entries included comments like “Best new hide in this area this year” and “Coordinates perfect — brought the whole family, absolutely beautiful spot.” Within 60 days the cache had accumulated 34 finds, 11 favourite points, and a feature in a regional geocaching group’s newsletter highlighting top new hides.
The difference between this cache and an average first hide? Accurate coordinates, a meaningful and beautiful location, a well-equipped container, and a listing that told a genuine story about the place. None of this required advanced skills or expensive gear. It required thought, care, and the willingness to do the preparation before hitting the submit button.
Frequently Asked Questions About Creating Your First Geocache
How many caches should I find before hiding my first one?
Geocaching.com strongly recommends finding at least 20 caches before placing your first hide. This gives you a clear, practical understanding of what a great hide feels and looks like from the seeker’s perspective. Many experienced geocachers suggest 50 finds as an even more useful benchmark — but 20 is the widely accepted community minimum. It is enough experience to develop genuine judgement about containers, coordinates, terrain, and what makes a location truly worth visiting.
Do I need a premium membership to hide a geocache?
No. A free Basic membership on Geocaching.com is all you need to submit a traditional geocache listing. Premium membership — priced at approximately $30 per year in 2026 — unlocks additional cache types including premium-member-only hides, expanded listing management tools, and deeper community stats. For your first hide, a free account covers everything you need from start to publication.
How close can my geocache be to another one?
According to Geocaching.com’s official guidelines, your cache must be placed at least 528 feet (0.1 miles, or roughly 161 metres) from any other active cache listing. This rule applies to all listed cache types and prevents saturation in popular areas. The Geocaching app’s live map makes it simple to check your intended location against nearby active listings before you commit to placing anything.
Do I need permission to place a geocache?
Yes, in almost every case. On private land, you need explicit written permission from the property owner. On public land — parks, forests, recreation areas — you need documented approval from the managing authority. Many land management agencies have specific geocaching policies and formal permit processes. Geocaching HQ includes landowner permission requirements prominently in its cache listing guidelines, and volunteer reviewers routinely verify cache placements on sensitive lands. Placing a cache without permission risks immediate archival and potential legal issues.
How long does it take for a geocache listing to get approved?
Most geocache listings are reviewed and published within 3 to 7 days. Geocaching.com uses a global network of volunteer reviewers who check listings against community guidelines before publishing. Review times vary by region and current reviewer workload — in busy geocaching areas, listings occasionally go live within 24 hours. Submitting a complete, accurate listing with no missing required fields significantly speeds up the process and reduces the chance of a revision request.
What should I put inside my geocache?
Every geocache must include a logbook and a writing implement. For small containers and above, you can add trade items — small toys, keyrings, coins, collectible pins, or stickers. The community guideline is to trade equal or trade up, meaning any item you take should be replaced with something of equal or greater value. Never include food, liquids, sharp objects, weapons, or anything age-inappropriate. Geocaches are discovered by people of all ages, including young children, and cache contents should reflect that.
Can I move my geocache after it has been published?
Yes, but you must update the coordinates in your Geocaching.com listing immediately after relocating the cache. Moving a cache without updating the listed coordinates leaves seekers searching in entirely the wrong location, generating frustrated Did Not Find logs and damaging your reputation as a reliable cache owner. For any significant move, temporarily disable the listing while you verify and resubmit the updated coordinates for reviewer approval before re-enabling it.
Your First Geocache: Action Plan and Timeline
Creating your first geocache is one of the most satisfying milestones in the hobby. It changes how you look at landscapes, how you explore your local area, and how you engage with the global geocaching community. Here is a realistic timeline to take you from idea to published listing.
- Weeks 1–4: Keep finding caches. Aim for a minimum of 20 finds. Pay close attention to what you love and what frustrates you about each one — that judgement is the raw material of a great hide.
- Week 5: Scout 3–5 potential hiding spots. Check the app map for the 528-foot saturation rule, assess land ownership, get permission in writing, and photograph each location.
- Week 6: Choose your container, prepare it fully with a logbook, pencil, desiccant, and trade items. Place the cache. Average your GPS coordinates across two separate visits for maximum accuracy.
- Week 7: Write your listing on Geocaching.com. Set honest D/T ratings, write a compelling 150–200 word description, add an encrypted hint, and upload at least one location photo.
- Weeks 7–8: Submit for review. Respond promptly to any reviewer feedback. Once published, monitor your logs daily for the first two weeks and correct any coordinate issues immediately.
- Ongoing: Visit your cache every 90 days. Replace the logbook when needed, check the container, and respond to any Needs-Maintenance logs within two weeks of receiving them.
There are more than 3 million geocaches hidden across this planet. Every single one started exactly where you are right now — with one person who thought, “I know the perfect spot.” Go find your perfect spot. The geocaching community is waiting to sign your logbook.
—